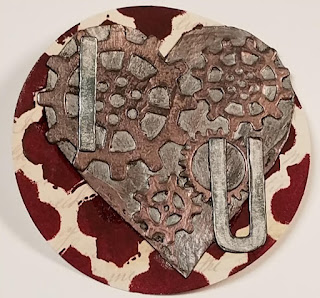
Valentine's Steampunk Artis Trading Coin
Hello again, you wonderful people! I am back with the last of four Valentine's-themed artist trading coins. I do have a video up on YouTube, so if you are interested in watching it, please scroll to the bottom of the page or follow this link.
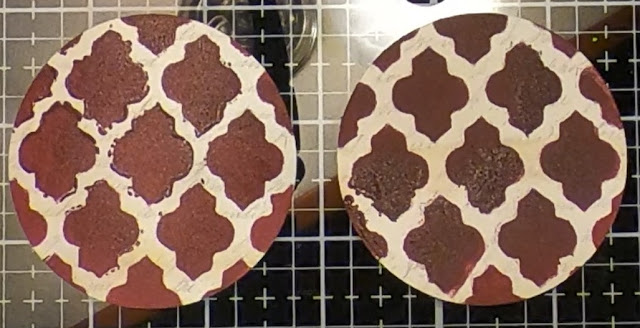
I started off by punching the 2.5-inch circle from thickish scrapbook paper, then I traced the heart shape onto a different scrapbook paper and cut it out. (Not that it matters much, but the scrapbook paper I used for the coin shape was double sided, and I ended up painting over the opposite side from what you see in the photo below.)
To make the gears, I cut them out of scrapbook paper using the Sizzix/Tim Holtz "Gearhead" die set.
I glued the gears onto the hearts and then I covered them black gesso made by Liquitex. This will make adding the wax more striking. When they were dry, I pulled out the Finnabair Art Alchemy Metallique Waxes in Brushed Iron and Rose Gold.
To start, I used an old paintbrush to add the Brushed Iron to the hearts and gears. This wax is SO creamy! I was surprised at just how smoothly it went onto the hearts. I then used a paper towel to wipe off the excess wax. I'm not sure if you can see it in the photo below, but it looks a little more aged and grungy by allowing some of that black gesso to almost peek through.
Next, I took the Rose Gold and a clean corner of the paper towel and lightly added the Rose Gold to the gears. The helps make the gears stand out from the background. I really fell in love with the look of the gear-heart!
I don't have photos of the next thing I did, but it was super simple. I cut out the letters "I" and "U" (to make the final coin read "I <Heart> U") from a Sizzix/Tim Holtz letters and number die set out of black cardstock. I used a silver Sharpie marker to color the letters, edged them with a black Sharpie marker, and then added some metallic wax called "Hematite" by Viva Inka Gold. The Hematite ages the letters so beautifully!
Going back to the coins, I pounced Dylusions acrylic paint in Pomegranate Seed through an UmWow Studios stencil called Moroccan Tile to make the pretty lattice look on the coin.
I glued everything together with some Tacky Glue - the hearts were a bit heavier than regular paper by this point, and a little warped, so I needed something strong and not as messy. Viola, I am done! I do wonder if I should have edged the coin in black, but there was so much going on with the coin that I was worried that I would have overdone it, but in the end, I do love the coin.
That's it for now - tune back next time when I show how I made some mixed media inchies! Thank you for stopping by! (The video is linked below.)


Comments
Post a Comment